
History Topics
LINUX BASICS FOR HACKERS
 |
| kali Linuk |
Getting Started with Networking, Scripting, and Security in Kali
Tutorials
by OccupyTheWeb
Offers & Deals
Highlights

Settings
Support
San Francisco
Sign Out
laylists
LINUX BASICS FOR HACKERS. Copyright © 2019 by OccupyTheWeb.
istory
All rights reserved. No part of this work may be reproduced or transmitted in any form
or by any means, electronic or mechanical, including photocopying, recording, or by opics
any information storage or retrieval system, without the prior written permission of the copyright owner and the publisher.
utorials
ISBN10: 1593278551
ffers & Deals
ISBN13: 9781593278557
ighlights
Publisher: William Pollock
Production Editors: Serena Yang and Meg Sneeringer
ettings
Cover Illustration: Josh Ellingson
Interior Design: Octopod Studios
Support
Developmental Editor: Liz Chadwick
Technical Reviewer: Cliff Janzen
Sign Out
Copyeditor: Barton D. Reed
Compositors: Serena Yang and Meg Sneeringer
Proofreader: Paula L. Fleming
Indexer: JoAnne Burek
For information on distribution, translations, or bulk sales, please contact No Starch Press, Inc. directly:
No Starch Press, Inc.
245 8th Street, San Francisco, CA 94103
phone: 1.415.863.9900; info@nostarch.com
www.nostarch.com
Library of Congress CataloginginPublication Data
Names: OccupyTheWeb, author.
Title: Linux basics for hackers : getting started with networking, scripting, and security in Kali / OccupyTheWeb.
Description: First edition. | San Francisco : No Starch Press, Inc., [2018]. Identifiers: LCCN 2018030544 (print) | LCCN 2018032646 (ebook) | ISBN
9781593278564 (epub) | ISBN 159327856X (epub) | ISBN 9781593278557 (print) | ISBN 1593278551 (print) | ISBN 9781593278564 (ebook) | ISBN 159327856X (ebook)
Subjects: LCSH: Penetration testing (Computer security) | Kali Linux. | Hackers. | Operating systems (Computers)
Classification: LCC QA76.9.A25 (ebook) | LCC QA76.9.A25 O325 2018 (print) | DDC 005.8dc23
LC record available at https://lccn.loc.gov/2018030544
No Starch Press and the No Starch Press logo are registered trademarks of No Starch Press, Inc. Other product and company names mentioned herein may be the trademarks of their respective owners. Rather than use a trademark symbol with every occurrence of a trademarked name, we are using the names only in an editorial fashion and to the benefit of the trademark owner, with no intention of infringement of the trademark.
The information in this book is distributed on an “As Is” basis, without warranty. While every precaution has been taken in the preparation of this work, neither the author nor No Starch Press, Inc. shall have any liability to any person or entity with respect to any
loss or damage caused or alleged to be caused directly or indirectly by the information contained in it.
y
History
Topics

Tutorials
Offers & Deals Highlights
INTRODUCTION
Hacking is the most important skill set of the 21st century! I don’t make that statement Settings
lightly. Events in recent years seem to reaffirm this statement with every morning’s headline. Nations are spying on each other to gain secrets, cyber criminals are stealing
Support
billions of dollars, digital worms demanding ransoms are being released, adversaries Sign Out
are influencing each other’s elections, and combatants are taking down each other’s utilities. These are all the work of hackers, and their influence over our increasingly digital world is just beginning to be felt.
I decided to write this book after working with tens of thousands of aspiring hackers through NullByte, https://www.hackersarise.com/, and nearly every branch of the US military and intelligence agencies (NSA, DIA, CIA, and FBI). These experiences have taught me that many aspiring hackers have had little or no experience with Linux, and this lack of experience is the primary barrier to their starting the journey to becoming professional hackers. Almost all the best hacker tools are written in Linux, so some basic Linux skills are a prerequisite to becoming a professional hacker. I have written this book to help aspiring hackers get over this barrier.
Hacking is an elite profession within the IT field. As such, it requires an extensive and detailed understanding of IT concepts and technologies. At the most fundamental level, Linux is a requirement. I strongly suggest you invest time and energy into using and understanding it if you want to make hacking and information security your career.
This book is not intended for the experienced hacker or the experienced Linux admin.
Instead, it is intended for those who want to get started along the exciting path of hacking, cybersecurity, and pentesting. It is also intended not as a complete treatise on Linux or hacking but rather a starting point into these worlds. It begins with the essentials of Linux and extends into some basic scripting in both bash and Python. Wherever appropriate, I have tried to use examples from the world of hacking to teach Linux principles.
In this introduction, we’ll look at the growth of ethical hacking for information security, and I’ll take you through the process of installing a virtual machine so you can install Kali Linux on your system without disturbing the operating system you are already running.
WHAT’S IN THIS BOOK
In the first set of chapters you’ll get comfortable with the fundamentals of Linux; Chapter 1 will get you used to the file system and the terminal, and give you some basic commands. Chapter 2 shows you how to manipulate text to find, examine, and alter software and files.
In Chapter 3 you’ll manage networks. You’ll scan for networks, find information on connections, and disguise yourself by masking your network and DNS information.
Chapter 4 teaches you to add, remove, and update software, and how to keep your system streamlined. In Chapter 5, you’ll manipulate file and directory permissions to control who can access what. You’ll also learn some privilege escalation techniques.
Chapter 6 teaches you how to manage services, including starting and stopping processes and allocating resources to give you greater control. In Chapter 7 you’ll manage environment variables for optimal performance, convenience, and even stealth. You’ll find and filter variables, change your PATH variable, and create new environment variables.
Chapter 8 introduces you to bash scripting, a staple for any serious hacker. You’ll learn the basics of bash and build a script to scan for target ports that you might later infiltrate.
Chapters 9 and 10 give you some essential file system management skills, showing you how to compress and archive files to keep your system clean, copy entire storage devices, and get information on files and connected disks.
The latter chapters dig deeper into hacking topics. In Chapter 11 you’ll use and
manipulate the logging system to get information on a target’s activity and cover your own tracks. Chapter 12 shows you how to use and abuse three core Linux services: Apache web server, OpenSSH, and MySQL. You’ll create a web server, build a remote video spy, and learn about databases and their vulnerabilities. Chapter 13 will show you how to stay secure and anonymous with proxy servers, the Tor network, VPNs, and encrypted email.
Chapter 14 deals with wireless networks. You’ll learn basic networking commands, then crack WiFi access points and detect and connect to Bluetooth signals.
Chapter 15 dives deeper into Linux itself with a high level view of how the kernel works and how its drivers can be abused to deliver malicious software. In Chapter 16 you’ll learn essential scheduling skills in order to automate your hacking scripts. Chapter 17 will teach you core Python concepts, and you’ll script two hacking tools: a scanner to spy on TCP/IP connections, and a simple password cracker.
WHAT IS ETHICAL HACKING?
With the growth of the information security field in recent years has come dramatic growth in the field of ethical hacking, also known as white hat (good guy) hacking. Ethical hacking is the practice of attempting to infiltrate and exploit a system in order to find out its weaknesses and better secure it. I segment the field of ethical hacking into two primary components: penetration testing for a legitimate information security firm and working for your nation’s military or intelligence agencies. Both are rapidly growing areas, and demand is strong.
Penetration Testing
As organizations become increasingly security conscious and the cost of security breaches rises exponentially, many large organizations are beginning to contract out security services. One of these key security services is penetration testing. A penetration test is essentially a legal, commissioned hack to demonstrate the vulnerability of a firm’s network and systems.
Generally, organizations conduct a vulnerability assessment first to find potential vulnerabilities in their network, operating systems, and services. I emphasize potential, as this vulnerability scan includes a significant number of false positives (things identified as vulnerabilities that really are not). It is the role of the penetration tester to attempt to hack, or penetrate, these vulnerabilities. Only then can the organization know whether the vulnerability is real and decide to invest time and money to close the vulnerability.
Military and Espionage
Military and Espionage
Nearly every nation on earth now engages in cyber espionage and cyber warfare. One only needs to scan the headlines to see that cyber activities are the chosen method for spying on and attacking military and industrial systems.
Hacking plays a crucial part in these military and intelligencegathering activities, and that will only be more true as time goes by. Imagine a war of the future where hackers can gain access to their adversary’s war plans and knock out their electric grid, oil refineries, and water systems. These activities are taking place every day now. The hacker thus becomes a key component of their nation’s defense.
WHY HACKERS USE LINUX
So why do hackers use Linux over other operating systems? Mostly because Linux offers a far higher level of control via a few different methods.
Linux Is Open Source
Unlike Windows, Linux is open source, meaning that the source code of the operating system is available to you. As such, you can change and manipulate it as you please. If you are trying to make a system operate in ways it was not intended to, being able to manipulate the source code is essential.
Linux Is Transparent
To hack effectively, you must know and understand your operating system and, to a large extent, the operating system you are attacking. Linux is totally transparent, meaning we can see and manipulate all its working parts.
Not so with Windows. Microsoft tries hard to make it as difficult as possible to know the inner workings of its operating systems, so you never really know what’s going on “under the hood,” whereas in Linux, you have a spotlight shining directly on each and every component of the operating system. This makes working with Linux more effective.
Linux Offers Granular Control
Linux is granular. That means that you have an almost infinite amount of control over the system. In Windows, you can control only what Microsoft allows you to control. In Linux, everything can be controlled by the terminal, at the most miniscule level or the most macro level. In addition, Linux makes scripting in any of the scripting languages
simple and effective.
Most Hacking Tools Are Written for Linux
Well over 90 percent of all hacking tools are written for Linux. There are exceptions, of course, such as Cain and Abel and Wikto, but those exceptions prove the rule. Even when hacking tools such as Metasploit or nmap are ported for Windows, not all the capabilities transfer from Linux.
The Future Belongs to Linux/Unix
This might seem like a radical statement, but I firmly believe that the future of information technology belongs to Linux and Unix systems. Microsoft had its day in the 1980s and 1990s, but its growth is slowing and stagnating.
Since the internet began, Linux/Unix has been the operating system of choice for web servers due to its stability, reliability, and robustness. Even today, Linux/Unix is used in twothirds of web servers and dominates the market. Embedded systems in routers,
switches, and other devices almost always use a Linux kernel, and the world of virtualization is dominated by Linux, with both VMware and Citrix built on the Linux kernel.
Over 80 percent of mobile devices run Unix or Linux (iOS is Unix, and Android is Linux), so if you believe that the future of computing lies in mobile devices such as tablets and phones (it would be hard to argue otherwise), then the future is Unix/Linux. Microsoft Windows has just 7 percent of the mobile devices market. Is that the wagon you want to be hitched to?
DOWNLOADING KALI LINUX
Before getting started, you need to download and install Kali Linux on your computer. This is the Linux distribution we will be working with throughout this book. Linux was first developed by Linus Torvalds in 1991 as an open source alternative to Unix. Since it is open source, volunteer developers code the kernel, the utilities, and the applications. This means that there is no overriding corporate entity overseeing development, and as a result, conventions and standardization are often lacking.
Kali Linux was developed by Offensive Security as a hacking operating system built on a distribution of Linux called Debian. There are many distributions of Linux, and Debian is one of the best. You are probably most familiar with Ubuntu as a popular desktop distribution of Linux. Ubuntu is also built on Debian. Other distributions
include Red Hat, CentOS, Mint, Arch, and SUSE. Although they all share the same Linux kernel (the heart of the operating system that controls the CPU, RAM, and so on), each has its own utilities, applications, and choice of graphical interface (GNOME, KDE, and others) for different purposes. As a result, each of these distributions of Linux looks and feels slightly different. Kali was designed for penetration testers and hackers and comes with a significant complement of hacking tools.
I strongly recommend that you use Kali for this book. Although you can use another distribution, you will likely have to download and install the various tools we will be using, which could mean many hours downloading and installing tools. In addition, if that distribution is not built on Debian, there may be other minor differences. You can download and install Kali from https://www.kali.org/.
From the home page, click the Downloads link at the top of the page. On the Downloads page you’ll be faced with multiple download choices. It’s important to choose the right download. Along the left side of the table, you will see the image name, which is the name of the version that the link downloads. For instance, the first image name listing I see is Kali Linux 64 Bit, meaning it’s the full Kali Linux and is suitable for 64bit systems—most modern systems use a 64bit Intel or AMD CPU. To determine what type of CPU is on your system, go to Control Panel ▸ System and Security ▸ System, and it should be listed. If your system is 64bit, download and install the 64 bit version of the full Kali (not Light or Lxde, or any of the other alternatives).
If you are running an older computer with a 32bit CPU, you will need to install the 32 bit version, which appears lower on the page.
You have a choice of downloading via HTTP or Torrent. If you choose HTTP, Kali will download directly to your system just like any download, and it will be placed in your Downloads folder. The torrent download is the peertopeer download used by many filesharing sites. You will need a torrenting application like BitTorrent to do this. The Kali file will then download to the folder in which the torrenting application stores its downloads.
There are other versions for other types of CPUs, such as the commonly used ARM architecture found in so many mobile devices. If you are using a Raspberry Pi, tablet, or other mobile device (phone users will likely prefer Kali NetHunter), make certain you download and install the ARM architecture version of Kali by scrolling down to Download ARM images and clicking Kali ARM Images.
You have Kali downloaded, but before you install anything, I want to talk a bit about
virtual machines. Generally, for the beginner, installing Kali into a virtual machine is the best solution for learning and practicing.
VIRTUAL MACHINES
Virtual machine (VM) technology allows you to run multiple operating systems from one piece of hardware like your laptop or desktop. This means that you can continue to run the Windows or MacOS operating system you are familiar with and run a virtual machine of Kali Linux inside that operating system. You don’t need to overwrite your existing OS to learn Linux.
Numerous virtual machine applications are available from VMware, Oracle, Microsoft, and other vendors. All are excellent, but here I will be showing you how to download and install Oracle’s free VirtualBox.
Installing VirtualBox
You can download VirtualBox at https://www.virtualbox.org/, as shown in Figure 1. Click the Downloads link in the left menu, and select the VirtualBox package for your computer’s current operating system, which will host VirtualBox VM. Make sure to download the latest version.
Figure 1: VirtualBox home page

When the download has completed, click the setup file, and you will be greeted by a familiar Setup Wizard, shown in Figure 2.
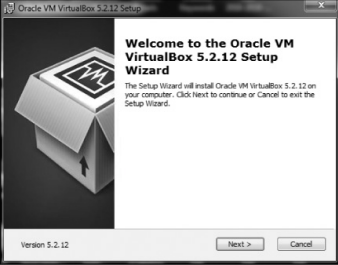
Figure 2: The Setup Wizard dialog
Click Next, and you should be greeted with the Custom Setup screen, as in Figure 3.
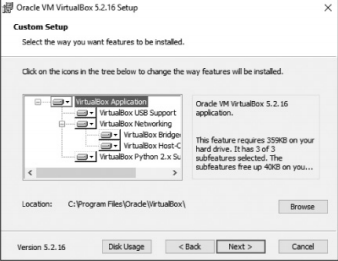
Figure 3: The Custom Setup dialog
From this screen, simply click Next. Keep clicking Next until you get to the Network Interfaces warning screen and then click Yes.
Click Install to begin the process. During this process, you will likely be prompted several times about installing device software. These are the virtual networking devices necessary for your virtual machines to communicate. Click Install for each one.
When the installation is complete, click Finish.
Setting Up Your Virtual Machine
Now let’s get you started with your virtual machine. VirtualBox should open once it has installed—if not, open it—and you should be greeted by the VirtualBox Manager, as seen in Figure 4.
Figure 4: The VirtualBox Manager
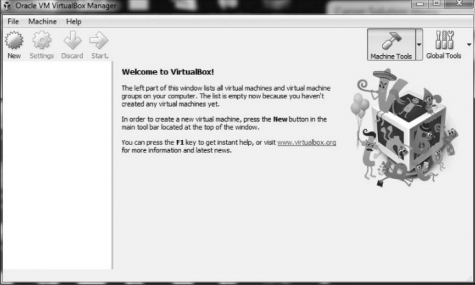
Since we will be creating a new virtual machine with Kali Linux, click New in the upperleft corner. This opens the Create Virtual Machine dialog shown in Figure 5.
Give your machine a name (any name is okay, but I simply used Kali) and then select Linux from the Type dropdown menu. Finally, select Debian (64bit) from the third dropdown menu (unless you are using the 32bit version of Kali, in which case select the Debian 32bit version). Click Next, and you’ll see a screen like Figure 6. Here, you need to select how much RAM you want to allocate to this new virtual machine.

Figure 5: The Create Virtual Machine dialog
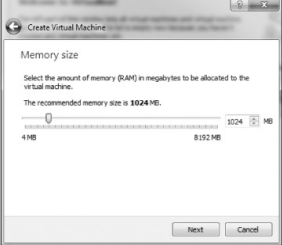
Figure 6: Allocating memory
As a rule of thumb, I don’t recommend using more than 25 percent of your total system RAM. That means if you have installed 4GB on your physical or host system, then select just 1GB for your virtual machine, and if you have 16GB on your physical system, then select 4GB. The more RAM you give your virtual machine, the better and faster it will run, but you must also leave enough RAM for your host operating system and any other virtual machines you might want to run simultaneously. Your virtual machines will not use any RAM when you are not using them, but they will use hard drive space.
Click Next, and you’ll get to the Hard Disk screen. Choose Create Virtual Hard Disk and click Create.
In the next screen, you can decide whether you want the hard drive you are creating to be allocated dynamically or at a fixed size. If you choose Dynamically Allocated, the system will not take the entire maximum size you allocate for the virtual hard disk until
you need it, saving more unused hard disk space for your host system. I suggest you select dynamically allocated.
Click Next, and you’ll choose the amount of hard drive space to allocate to the VM and the location of the VM (see Figure 7).

Figure 7: Allocating hard drive space
The default is 8GB. I usually find that to be a bit small and recommend that you allocate 20–25GB at a minimum. Remember, if you chose to dynamically allocate hard drive space, it won’t use the space until you need it, and expanding your hard drive after it has already been allocated can be tricky, so better to err on the high side.
Click Create, and you’re ready to go!
Installing Kali on the VM
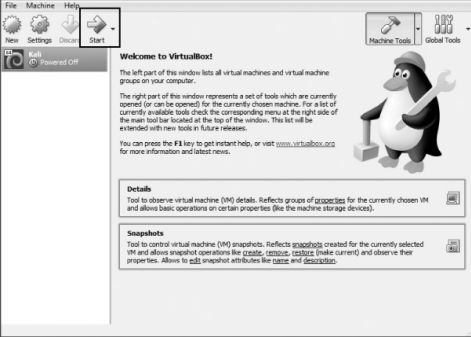
At this point, you should see a screen like Figure 8. Now you’ll need to install Kali. Note that on the left of the VirtualBox Manager, you should see an indication that Kali VM is powered off. Click the Start button (green arrow icon).
Figure 8: The VirtualBox welcome screen
The VirtualBox Manager will then ask where to find the startup disk. You’ve already downloaded a disk image with the extension .iso, which should be in your Downloads folder (if you used a torrent to download Kali, the .iso file will be in the Downloads folder of your torrenting application). Click the folder icon to the right, navigate to the Downloads folder, and select the Kali image file (see Figure 9).
Figure 9: Selecting your startup disk

Then click Start. Congratulations, you’ve just installed Kali Linux on a virtual machine!
SETTING UP KALI
Kali will now open a screen like Figure 10, offering you several startup choices. I suggest using the graphical install for beginners. Use your keyboard keys to navigate the menu.
If you get an error when you’re installing Kali into your VirtualBox, it’s likely because you don’t have virtualization enabled within your system’s BIOS. Each system and its BIOS is slightly different, so check with your manufacturer or search online for solutions for your system and BIOS. In addition, on Windows systems, you will likely need to disable any competing virtualization software such as HyperV. Again, an internet search for your system should guide you in doing so.
Figure 10: Selecting the install method

You will next be asked to select your language. Make certain you select the language you are most comfortable working in and then click Continue. Next, select your location, click Continue, and then select your keyboard layout.
When you click Continue, VirtualBox will go through a process of detecting your hardware and network adapters. Just wait patiently as it does so. Eventually, you will be greeted by a screen asking you to configure your network, as in Figure 11.
Figure 11: Entering a hostname
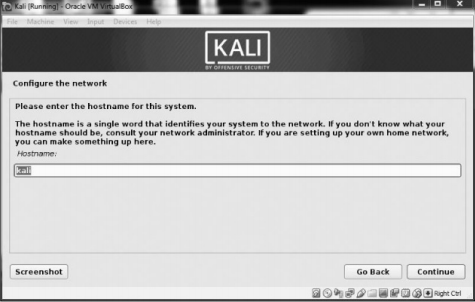
The first item it asks for is the name of your host. You can name it anything you please, but I left mine with the default “kali.”
Next, you will be asked for the domain name. It’s not necessary to enter anything here. Click Continue. The next screen, shown in Figure 12, is very important. Here, you are asked for the password you want to use for the root user.
Figure 12: Choosing a password

The root user in Linux is the allpowerful system administrator. You can use any password you feel secure with. If this were a physical system that we were using on the internet, I would suggest that you use a very long and complex password to limit the ability of an attacker to crack it. Since this is a virtual machine that people can’t access without first accessing your host operating system, password authentication on this virtual machine is less important, but you should still choose wisely.
Click Continue, and you will be asked to set your time zone. Do so and then continue.
The next screen asks about partition disks (a partition is just what it sounds like—a portion or segment of your hard drive). Choose Guided – use entire disk, and Kali will detect your hard drives and set up a partitioner automatically.
Kali will then warn you that all data on the disk you select will be erased . . . but don’t worry! This is a virtual disk, and the disk is new and empty, so this won’t actually do anything. Click Continue.
Kali will now ask whether you want all files in one partition or if you want to have
separate partitions. If this were a production system, you probably would select separate partitions for /home, /var, and /tmp, but considering that we will be using this as a learning system in a virtual environment, it is safe for you to simply select All files in one partition.
Now you be will be asked whether to write your changes to disk. Select Finish partitioning and write changes to disk. Kali will prompt you once more to see if you want to write the changes to disk; select Yes and click Continue (see Figure 13).
Figure 13: Writing changes to disk

Kali will now begin to install the operating system. This could take a while, so be patient. Now is the time to take your bathroom break and get your favorite beverage.
Once the installation is complete, you will be prompted as to whether you want to use a network mirror. This really is not necessary, so click No.
Then Kali will prompt you as to whether you want to install GRUB (Grand Unified Bootloader), shown in Figure 14. A bootloader enables you to select different operating systems to boot into, which means when you boot your machine, you can boot into
either Kali or another operating system. Select Yes and click Continue. Figure 14: Installing GRUB
On the next screen, you will be prompted as to whether you want to install the GRUB bootloader automatically or manually. For reasons as yet unclear, if you choose the second option, Kali will tend to hang and display a blank screen after installation. Select Enter device manually, as shown in Figure 15.
Figure 15: Entering your device manually
On the following screen, select the drive where the GRUB bootloader should be installed (it will likely be something like /dev/sda). Click through to the next screen, which should tell you that the installation is complete.
Congratulations! You’ve installed Kali. Click Continue. Kali will attempt to reboot, and you will see a number of lines of code go across a blank, black screen before you are eventually greeted with Kali 2018’s login screen, as shown in Figure 16.
Figure 16: The Kali login screen
Log in as root, and you will be asked for your password. Enter whatever password you selected for your root user.
After logging in as root, you will be greeted with the Kali Linux desktop, as in Figure 17. Figure 17: The Kali home screen
You are now ready to begin your journey into the exciting field of hacking! Welcome!
History
Topics
Tutorials
Offers & Deals Highlights
Settings
Support
1
GETTING STARTED WITH THE BASICS
By our very nature, hackers are doers. We want to touch and play with things. We also want to create and, sometimes, break things. Few of us want to read long tomes of Sign Out
information technology theory before we can do what we love most: hacking. With that in mind, this chapter is designed to give you some fundamental skills to get you up and running in Kali . . . now!
In this chapter, we won’t go into any one concept in great detail—we’ll cover just enough to let you play and explore in the operating system of hackers: Linux. We will save more indepth discussions for later chapters.
INTRODUCTORY TERMS AND CONCEPTS
Before we begin our journey through the wonderful world of Linux Basics for Hackers, I want to introduce a few terms that should clarify some concepts discussed later in this chapter.
Binaries This term refers to files that can be executed, similar to executables in Windows. Binaries generally reside in the /usr/bin or usr/sbin directory and include utilities such as ps, cat, ls, and cd(we’ll touch on all of four of these in this chapter) as well as applications such as the wireless hacking tool aircrackng and the intrusion detection system (IDS) Snort.
Case sensitivity Unlike Windows, Linux is case sensitive. This means that Desktop is different from desktop, which is different from DeskTop. Each of these would represent a different file or directory name. Many people coming from a Windows environment can find this frustrating. If you get the error message “file or directory not found” and you are sure the file or directory exists, you probably need to check your case.
Directory This is the same as a folder in Windows. A directory provides a way of organizing files, usually in a hierarchical manner.
Home Each user has their own /home directory, and this is generally where files you create will be saved by default.
Kali Kali Linux is a distribution of Linux specifically designed for penetration testing. It has hundreds of tools preinstalled, saving you the hours it would take to download and install them yourself. I will be using the latest version of Kali at the time of this writing: Kali 2018.2, first released in April 2018.
root Like nearly every operating system, Linux has an administrator or superuser account, designed for use by a trusted person who can do nearly anything on the system. This would include such things as reconfiguring the system, adding users, and changing passwords. In Linux, that account is called root. As a hacker or pentester, you will often use the root account to give yourself control over the system. In fact, many hacker tools require that you use the root account.
Script This is a series of commands run in an interpretive environment that converts each line to source code. Many hacking tools are simply scripts. Scripts can be run with the bash interpreter or any of the other scripting language interpreters, such as Python, Perl, or Ruby. Python is currently the most popular interpreter among hackers.
Shell This is an environment and interpreter for running commands in Linux. The most widely used shell is bash, which stands for Bourneagain shell, but other popular shells include the C shell and Z shell. I will be using the bash shell exclusively in this book.
Terminal This is a command line interface (CLI).
With those basics behind us, we will attempt to methodically develop the essential Linux skills you’ll need to become a hacker or penetration tester. In this first chapter, I’ll walk you through getting started with Kali Linux.
A TOUR OF KALI
Once you start Kali, you’ll be greeted with a login screen, as shown in Figure 11. Log in using the root account username root and the default password toor.
Figure 11: Logging into Kali using the root account
You should now have access to your Kali desktop (see Figure 12). We’ll quickly look at two of the most basic aspects of the desktop: the terminal interface and file structure.
Figure 12: The Kali desktop
The Terminal
The Terminal
The first step in using Kali is to open the terminal, which is the command line interface we’ll use in this book. In Kali Linux, you’ll find the icon for the terminal at the bottom of the desktop. Doubleclick this icon to open the terminal or press CTRLALTT. Your new terminal should look like the one shown in Figure 13.
Figure 13: The Kali terminal
This terminal opens the command line environment, known as the shell, which enables you to run commands on the underlying operating systems and write scripts. Although Linux has many different shell environments, the most popular is the bash shell, which is also the default shell in Kali and many other Linux distributions.
To change your password, you can use the command passwd.
The Linux Filesystem
The Linux filesystem structure is somewhat different from that of Windows. Linux doesn’t have a physical drive (such as the C: drive) at the base of the filesystem but uses a logical filesystem instead. At the very top of the filesystem structure is /, which is often referred to as the root of the filesystem, as if it were an upsidedown tree (see
Figure 14). Keep in mind that this is different from the root user. These terms may seem confusing at first, but they will become easier to differentiate once you get used to Linux.
Figure 14: The Linux filesystem
The root (/) of the filesystem is at the top of the tree, and the following are the most important subdirectories to know:
/root The home directory of the allpowerful root user
/etc Generally contains the Linux configuration files—files that control when and how programs start up
/home The user’s home directory
/mnt Where other filesystems are attached or mounted to the filesystem /media Where CDs and USB devices are usually attached or mounted to the filesystem
/bin Where application binaries (the equivalent of executables in Microsoft Windows) reside
/lib Where you’ll find libraries (shared programs that are similar to Windows DLLs)
We’ll spend more time with these key directories throughout this book. Understanding these firstlevel directories is important to navigating through the filesystem from the command line.
It’s also important to know before you start that you should not log in as root when performing routine tasks, because anyone who hacks your system (yes, hackers sometimes get hacked) when you’re logged in as root would immediately gain root privileges and thus “own” your system. Log in as a regular user when starting regular
applications, browsing the web, running tools like Wireshark, and so on.
BASIC COMMANDS IN LINUX
To begin, let’s look at some basic commands that will help you get up and running in Linux.
Finding Yourself with pwd
Unlike when you’re working in a graphical user interface (GUI) environment like Windows or macOS, the command line in Linux does not always make it apparent which directory you’re presently in. To navigate to a new directory, you usually need to know where you are currently. The present working directory command, pwd, returns your location within the directory structure.
Enter pwdin your terminal to see where you are:
kali >pwd
/root
In this case, Linux returned /root, telling me I’m in the root user’s directory. And because you logged in as root when you started Linux, you should be in the root user’s directory, too, which is one level below the top of the filesystem structure (/).
If you’re in another directory, pwdwill return that directory name instead.
Checking Your Login with whoami
In Linux, the one “allpowerful” superuser or system administrator is named root, and it has all the system privileges needed to add users, change passwords, change privileges, and so on. Obviously, you don’t want just anyone to have the ability to make such changes; you want someone who can be trusted and has proper knowledge of the operating system. As a hacker, you usually need to have all those privileges to run the programs and commands you need (many hacker tools won’t work unless you have root privileges), so you’ll want to log in as root.
If you’ve forgotten whether you’re logged in as root or another user, you can use the whoamicommand to see which user you’re logged in as:
kali >whoami
root
If I had been logged in as another user, such as my personal account, whoamiwould have returned my username instead, as shown here:
kali >whoami
OTW
Navigating the Linux Filesystem
Navigating the filesystem from the terminal is an essential Linux skill. To get anything done, you need to be able to move around to find applications, files, and directories located in other directories. In a GUIbased system, you can visually see the directories, but when you’re using the command line interface, the structure is entirely text based, and navigating the filesystem means using some commands.
Changing Directories with cd
To change directories from the terminal, use the change directory command, cd. For example, here’s how to change to the /etc directory used to store configuration files:
kali >cd/etc
root@kali:/etc#
The prompt changes to root@kali:/etc, indicating that we’re in the /etc directory. We can confirm this by entering pwd:
root@kali:/etc# pwd
/etc
To move up one level in the file structure (toward the root of the file structure, or /), we use cdfollowed by double dots (..), as shown here:
root@kali:/etc# cd..
root@kali:/# pwd
/
root@kali:/#
This moves us up one level from /etc to the / root directory, but you can move up as
many levels as you need. Just use the same number of doubledot pairs as the number of levels you want to move:
You would use ..to move up one level.
You would use ....to move up two levels.
You would use ......to move up three levels, and so on.
So, for example, to move up two levels, enter cdfollowed by two sets of double dots with a space in between:
kali >cd....
You can also move up to the root level in the file structure from anywhere by entering cd /, where /represents the root of the filesystem.
Listing the Contents of a Directory with ls
To see the contents of a directory (the files and subdirectories), we can use the ls(list) command. This is very similar to the dircommand in Windows.
kali >ls
bin initrd.img media run var
boot initrd.img.old mnt sbin vmlinuz
dev lib opt srv vmlinuz.old
etc lib64 proc tmp
home lost+found root usr
This command lists both the files and directories contained in the directory. You can also use this command on any particular directory, not just the one you are currently in, by listing the directory name after the command; for example, ls/etcshows what’s in the /etc directory.
To get more information about the files and directories, such as their permissions, owner, size, and when they were last modified, you can add the -lswitch after ls(the l stands for long). This is often referred to as long listing. Let’s try it here:
As you can see, ls-lprovides us with significantly more information, such as whether an object is a file or directory, the number of links, the owner, the group, its size, when it was created or modified, and its name.
I typically add the -lswitch whenever doing a listing in Linux, but to each their own. We’ll talk more about ls-lin Chapter 5.
Some files in Linux are hidden and won’t be revealed by a simple lsor ls-lcommand. To show hidden files, add a lowercase –aswitch, like so:
kali >ls-la
If you aren’t seeing a file you expect to see, it’s worth trying lswith the aflag.
Getting Help
Nearly every command, application, or utility has a dedicated help file in Linux that provides guidance for its use. For instance, if I needed help using the best wireless cracking tool, aircrackng, I could simply type the aircrack-ngcommand followed by the --helpcommand:
kali >aircrack-ng--help
Note the double dash here. The convention in Linux is to use a double dash (--) before word options, such as help, and a single dash (-) before singleletter options, such as –h.
When you enter this command, you should see a short description of the tool and guidance on how to use it. In some cases, you can use either -hor -?to get to the help file. For instance, if I needed help using the hacker’s best portscanning tool, nmap, I would enter the following:
kali >nmap-h
Unfortunately, although many applications support all three options (--help, -h, and -?), there’s no guarantee the application you’re using will. So if one option doesn’t work, try another.
Referencing Manual Pages with man
In addition to the help switch, most commands and applications have a manual (man) page with more information, such as a description and synopsis of the command or application. You can view a man page by simply typing manbefore the command, utility, or application. To see the man page for aircrackng, for example, you would enter the following:
This opens the manual for aircrackng, providing you with more detailed information than the helpscreen. You can scroll through this manual file using the ENTER key, or you can page up and down using the PG DN and PG UP keys, respectively. To exit, simply enter q(for quit), and you’ll return to the command prompt.
FINDING STUFF
Until you become familiar with Linux, it can be frustrating to find your way around, but knowledge of a few basic commands and techniques will go a long way toward making the command line much friendlier. The following commands help you locate things from the terminal.
Searching with locate
Searching with locate
Probably the easiest command to use is locate. Followed by a keyword denoting what it is you want to find, this command will go through your entire filesystem and locate every occurrence of that word.
To look for aircrackng, for example, enter the following:
kali >locateaircrack-ng
/usr/bin/aircrackng
/usr/share/applications/kaliaircrackng.desktop
/usr/share/desktopdirectories/05101aircrackng.directory
snip
/var/lib/dpkg/info/aircrackng.mg5sums
The locatecommand is not perfect, however. Sometimes the results of locatecan be overwhelming, giving you too much information. Also, locateuses a database that is usually only updated once a day, so if you just created a file a few minutes or a few hours ago, it might not appear in this list until the next day. It’s worth knowing the
disadvantages of these basic commands so you can better decide when best to use each one.
Finding Binaries with whereis
If you’re looking for a binary file, you can use the whereiscommand to locate it. This command returns not only the location of the binary but also its source and man page if they are available. Here’s an example:
kali >whereisaircrack-ng
aircarckng: /usr/bin/aircarckng /usr/share/man/man1/aircarckng.1.gz
In this case, whereisreturned just the aircrackng binaries and man page, rather than every occurrence of the word aircrackng. Much more efficient and illuminating, don’t you think?
Finding Binaries in the PATH Variable with which
The whichcommand is even more specific: it only returns the location of the binaries in the PATHvariable in Linux. We’ll look more closely at the PATHvariable in Chapter 7, but for now it’s sufficient to know that PATHholds the directories in which the operating
system looks for the commands you execute at the command line. For example, when I enter aircrack-ngon the command line, the operating system looks to the PATHvariable to see in which directories it should look for aircrackng:
kali >whichaircrack-ng
/usr/bin/aircrackng
Here, whichwas able to find a single binary file in the directories listed in the PATH variable. At minimum, these directories usually include /usr/bin, but may include /usr/sbin and maybe a few others.
Performing More Powerful Searches with find
The findcommand is the most powerful and flexible of the searching utilities. It is capable of beginning your search in any designated directory and looking for a number of different parameters, including, of course, the filename but also the date of creation or modification, the owner, the group, permissions, and the size.
Here’s the basic syntax for find:
find directoryoptionsexpression
So, if I wanted to search for a file with the name apache2 (the open source web server) starting in the root directory, I would enter the following:
kali >find/➊ -typef➋ -nameapache2➌
First I state the directory in which to start the search, in this case /➊. Then I specify which type of file to search for, in this case ffor an ordinary file ➋. Last, I give the name of the file I’m searching for, in this case apache2➌.
My results for this search are shown here:
kali >find /-typef-nameapache2
/usr/lib/apache2/mpmitk/apache2
/usr/lib/apache2/mpmevent/apache2
/usr/lib/apache2/mpmworker/apache2
/usr/lib/apache2/mpmprefork/apache2
/etc/cron.daily/apache2
/etc/logrotate.d/apache2
/etc/init.d/apache2
/etc/default/apache2
The findcommand started at the top of the filesystem (/), went through every directory looking for apache2 in the filename, and then listed all instances found.
As you might imagine, a search that looks in every directory can be slow. One way to speed it up is to look only in the directory where you would expect to find the file(s) you need. In this case, we are looking for a configuration file, so we could start the search in the /etc directory, and Linux would only search as far as its subdirectories. Let’s try it:
kali >find/etc-typef-nameapache2
/etc/init.d/apache2
/etc/logrotate.d/apache2
/etc/cron.daily/apache2
This much quicker search only found occurrences of apache2 in the /etc directory and its subdirectories. It’s also important to note that unlike some other search commands, finddisplays only exact name matches. If the file apache2 has an extension, such as apache2.conf, the search will not find a match. We can remedy this limitation by using wildcards, which enable us to match multiple characters. Wildcards come in a few different forms: *.,?and [].
Let’s look in the /etc directory for all files that begin with apache2 and have any extension. For this, we could write a findcommand using the following wildcard:
kali >find/etc-typef--nameapache2.*
/etc/apache2/apache2.conf
When we run this command, we find that there is one file in the /etc directory that fits the apache2.*pattern. When we use a period followed by the *wildcard, the terminal looks for any extension after the filename apache2. This can be a very useful technique for finding files where you don’t know the file extension.
When I run this command, I find two files that start with apache2 in the /etc directory, including the apache2.conf file.
A QUICK LOOK AT WILDCARDS
Let’s say we’re doing a search on a directory that has the files cat, hat, what, and bat. The ?wildcard is used to represent a single character, so a search for ?atwould find hat, cat, and bat but not what, because at in this filename is preceded by two letters. The []wildcard is used to match the characters that appear inside the square brackets. For example, a search for [c,b]atwould match cat and bat but not hat or what. Among the most widely used
wildcards is the asterisk (*), which matches any character(s) of any length, from none to an unlimited number of characters. A search for *at, for
example, would find cat, hat, what, and bat.
Filtering with grep
Very often when using the command line, you’ll want to search for a particular keyword. For this, you can use the grepcommand as a filter to search for keywords.
The grepcommand is often used when output is piped from one command to another. I cover piping in Chapter 2, but for now, suffice it to say that Linux (and Windows for that matter) allows us to take the output of one command and send it as input to another command. This is called piping, and we use the |command to do it (the | key is usually above the ENTER key on your keyboard).
The pscommand is used to display information about processes running on the machine. We cover this in more detail in Chapter 6, but for this example, suppose I want to see all the processes running on my Linux system. In this case, I can use the ps (processes) command followed by the auxswitches to specify which process information to display, like so:
kali >psaux
This provides me with a listing of all the processes running in this system—but what if I just want to find one process to see if it is running?
I can do this by piping the output from psto grepand searching for a keyword. For instance, to find out whether the apache2 service is running, I would enter the following.
kali >psaux|grepapache2
root 4851 0.2 0.7 37548 7668 ? Ss 10:14 0:00 /usr/sbin/apache2 k start root 4906 0.0 0.4 37572 4228 ? S 10:14 0:00 /usr/sbin/apache2 k start root 4910 0.0 0.4 37572 4228 ? Ss 10:14 0:00 /usr/sbin/apache2 k start snip
This command tells Linux to display all my services and then send that output to grep, which will look through the output for the keyword apache2 and then display only the relevant output, thus saving me considerable time and my eyesight.
MODIFYING FILES AND DIRECTORIES
Once you’ve found your files and directories, you’ll want to be able to perform actions on them. In this section, we look at how to create files and directories, copy files, rename files, and delete files and directories.
Creating Files
There are many ways to create files in Linux, but for now we’ll just look at two simple methods. The first is cat, which is short for concatenate, meaning to combine pieces together (not a reference to your favorite domesticated feline). The catcommand is generally used for displaying the contents of a file, but it can also be used to create small files. For creating bigger files, it’s better to enter the code in a text editor such as vim, emacs, leafpad, gedit, or kate and then save it as a file.
Concatenation with cat
The catcommand followed by a filename will display the contents of that file, but to create a file, we follow the catcommand with a redirect, denoted with the >symbol, and a name for the file we want to create. Here’s an example:
kali >cat>hackingskills
Hacking is the most valuable skill set of the 21st century!
When you press ENTER, Linux will go into interactive mode and wait for you to start entering content for the file. This can be puzzling because the prompt disappears, but if you simply begin typing, whatever you enter will go into the file (in this case, hackingskills). Here, I entered Hackingisthemostvaluableskillsetofthe21stcentury!. To exit and return to the prompt, I press CTRLD. Then, when I want to see what’s in the file hackingskills, I enter the following:
kali >cathackingskills
Hacking is the most valuable skill set of the 21st century!
If you don’t use the redirect symbol, Linux will spit back the contents of your file.
To add, or append, more content to a file, you can use the catcommand with a double redirect (>>), followed by whatever you want to add to the end of the file. Here’s an example:
kali >cat>>hackingskills
Everyone should learn hacking
Linux once again goes into interactive mode, waiting for content to append to the file. When I enter Everyoneshouldlearnhackingand press CTRLD, I am returned to the prompt. Now, when I display the contents of that file with cat, I can see that the file has been appended with Everyoneshouldlearnhacking, as shown here:
kali >cathackingskills
Hacking is the most valuable skill set of the 21st century! Everyone should learn hacking
If I want to overwrite the file with new information, I can simply use the catcommand with a single redirect again, as follows:
kali >cat>hackingskills
Everyone in IT security without hacking skills is in the dark
kali >cathackingskills
Everyone in IT security without hacking skills is in the dark
As you can see here, Linux goes into interactive mode, and I enter the new text and then exit back to the prompt. When I once again use catto see the content of the file, I see that my previous words have been overwritten with the latest text.
File Creation with touch
The second command for file creation is touch. This command was originally developed so a user could simply touch a file to change some of its details, such as the date it was created or modified. However, if the file doesn’t already exist, this command creates that file by default.
Let’s create newfile with touch:
kali >touchnewfile
Now when I then use ls–lto see the long list of the directory, I see that a new file has been created named newfile. Note that its size is 0because there is no content in newfile.
Creating a Directory
The command for creating a directory in Linux is mkdir, a contraction of make directory. To create a directory named newdirectory, enter the following command:
kali >mkdirnewdirectory
To navigate to this newly created directory, simply enter this:
kali >cdnewdirectory
Copying a File
To copy files, we use the cpcommand. This creates a duplicate of the file in the new location and leaves the old one in place.
Here, we’ll create the file oldfile in the root directory with touchand copy it to /root/newdirectory, renaming it in the process and leaving the original oldfile in place:
kali >toucholdfile
kali >cpoldfile /root/newdirectory/newfile
Renaming the file is optional and is done simply by adding the name you want to give it to the end of the directory path. If you don’t rename the file when you copy it, the file will retain the original name by default.
When we then navigate to newdirectory, we see that there is an exact copy of oldfile called newfile:
kali >cdnewdirectory
kali >ls
newfile oldfile
Renaming a File
Unfortunately, Linux doesn’t have a command intended solely for renaming a file, as Windows and some other operating systems do, but it does have the mv(move) command.
The mvcommand can be used to move a file or directory to a new location or simply to give an existing file a new name. To rename newfile to newfile2, you would enter the following:
kali >mvnewfilenewfile2
kali >ls
oldfile newfile2
Now when you list (ls) that directory, you see newfile2 but not newfile, because it has been renamed. You can do the same with directories.
Removing a File
To remove a file, you can simply use the rmcommand, like so:
kali >rmnewfile2
If you now do a long listing on the directory, you can confirm that the file has been removed.
Removing a Directory
The command for removing a directory is similar to the rmcommand for removing files but with dir(for directory) appended, like so:
kali >rmdirnewdirectory
rmdir:failed to remove 'newdirectory': Directory not empty
It’s important to note that rmdirwill not remove a directory that is not empty, but will give you a warning message that the “directory is not empty,” as you can see in this
example. You must first remove all the contents of the directory before removing it. This is to stop you from accidentally deleting objects you didn’t intend to delete.
If you do want to remove a directory and its content all in one go, you can use the -r switch after rm, like so:
kali >rm-rnewdirectory
Just a word of caution, though: be wary of using the -roption with rm, at least at first, because it’s very easy to remove valuable files and directories by mistake. Using rm-rin your home directory, for instance, would delete every file and directory there—probably not what you were intending.
GO PLAY NOW!
Now that you have some basic skills for navigating around the filesystem, you can play with your Linux system a bit before progressing. The best way to become comfortable with using the terminal is to try out your newfound skills right now. In subsequent chapters, we will explore farther and deeper into our hacker playground.
EXERCISES
Before you move on to Chapter 2, try out the skills you learned from this
chapter by completing the following exercises:
1. Use the lscommand from the root (/) directory to explore the
directory structure of Linux. Move to each of the directories with
the cdcommand and run pwdto verify where you are in the directory
structure.
2. Use the whoamicommand to verify which user you are logged in as. 3. Use the locatecommand to find wordlists that can be used for
password cracking.
4. Use the catcommand to create a new file and then append to that file. Keep in mind that >redirects input to a file and >>appends to a
file.
5. Create a new directory called hackerdirectory and create a new file in that directory named hackedfile. Now copy that file to your /root
directory and rename it secretfile.
Playlists
History
Topics
Tutorials
Offers & Deals Highlights
Settings
Support
2
TEXT MANIPULATION
In Linux, nearly everything you deal with directly is a file, and most often these will be text files; for instance, all configuration files in Linux are text files. So to reconfigure an Sign Out
application, you simply open the configuration file, change the text, save the file, and then restart the application—your reconfiguration is complete.
With so many text files, manipulating text becomes crucial in managing Linux and Linux applications. In this chapter, you’ll use several commands and techniques for manipulating text in Linux.
For illustrative purposes, I’ll use files from the world’s best network intrusion detection system (NIDS), Snort, which was first developed by Marty Roesch and is now owned by Cisco. NIDSs are commonly used to detect intrusions by hackers, so if you want to be a
successful hacker, you must be familiar with the ways NIDSs can deter attacks and the ways you can abuse them to avoid detection.
NOTE
If the version of Kali Linux you’re using doesn’t come preinstalled with Snort, you
can download the files from the Kali repository by entering apt-getinstallsnort.
VIEWING FILES
As demonstrated in Chapter 1, the most basic text display command is probably cat, but it has
its limitations. Use catto display the Snort config file (snort.conf) found in/etc/snort (see Listing 21).
kali >cat/etc/snort/snort.conf
Listing 21: Displaying snort.conf in the terminal window
Your screen should now display the entire snort.conf file, which will stream until it comes to the end of the file, as shown here. This isn’t the most convenient or practical way to view and work with this file.
# include $SO_RULE_PATH/exploit.rules
# include $SO_RULE_PATH/exploit.rules
# include $SO_RULE_PATH/exploit.rules
# include $SO_RULE_PATH/exploit.rules
# include $SO_RULE_PATH/exploit.rules
snip
# event thresholding or suppressions commands...
kali >
In the following two sections, I will show you the headand tailcommands, which are two methods for displaying just part of a file’s content in order to more easily view the key content.
Taking the Head
If you just want to view the beginning of a file, you can use the headcommand. By default, this command displays the first 10 lines of a file. The following command, for instance, shows you the first 10 lines of snort.conf:
kali >head/etc/snort/snort.conf
#
# VRT Rules Packages Snort.conf
#
# For more information visit us at:
snip
#Snort bugs:bugs@snort.org
If you want to see more or fewer than the default 10 lines, enter the quantity you want with
the dash (-) switch after the call to headand before the filename. For example, if you want to see the first 20 lines of the file, you would enter the command shown at the top of Listing 22.
kali >head-20/etc/snort/snort.conf
#
#VRT Rule Packages Snort.conf
#
#For more information visit us at:
#.
#.
#.
#Options : enablegre enablempls enabletargetbased
enableppm enableperfprofiling enablezlib enableact
liveresponse enablenormalizer enablereload enablereact
Listing 22: Displaying the first 20 lines of snort.conf in the terminal window You should see only the first 20 lines of snort.conf displayed in your terminal window.
Grabbing That Tail
The tailcommand is similar to the headcommand, but it’s used to view the last lines of a file. Let’s use it on snort.conf:
kali >tail/etc/snort/snort.conf
#include $SO_RULE_PATH/smtp.rules
#include $SO_RULE_PATH/specificthreats.rules
#include $SO_RULE_PATH/webactivex.rules
#include $SO_RULE_PATH/webclient.rules
#include $SO_RULE_PATH/webiis.rules
#include $SO_RULE_PATH/webmiscp.rules
#Event thresholding and suppression commands. See threshold.conf
Notice that this command displays some of the last includelines of the rules files, but not all of them, because similar to head, the default for tailis to show 10 lines. You can display more lines by grabbing the last 20 lines of snort.conf. As with the headcommand, you can tell tail how many lines to display by entering a dash (-) and then the number of lines between the command and the filename, as shown in Listing 23.
kali >tail-20/etc/snort/snort.conf
#include $SO_RULE_PATH/chat.rules
#include $SO_RULE_PATH/chat.rules
#include $SO_RULE_PATH/chat.rules
snip
#Event thresholding or suppression commands. See theshold.conf
Listing 23: Displaying the last 20 lines of snort.conf in the terminal window Now we can view nearly all the includelines of the rules files on one screen.
Numbering the Lines
Sometimes—especially with very long files—we may want the file to display line numbers. Since snort.conf has more than 600 lines, line numbers would be useful here. This makes it easier to reference changes and come back to the same place within the file.
To display a file with line numbers, we use the nl(number lines) command. Simply enter the command shown in Listing 24.
kali >nl/etc/snort/snort.conf
612
################################################################# 613 #dynamic library rules
614 #include $SO_RULE_PATH/badtraffic.rules
615 #include $SO_RULE_PATH/chat.rules
snip
630 #include $SO_RULE_PATH/webiis.rules
631 #include $SO_RULE_PATH/webmisc.rules
Listing 24: Displaying line numbers in terminal output
Each line now has a number, making referencing much easier.
FILTERING TEXT WITH GREP
The command grepis probably the most widely used text manipulation command. It lets you filter the content of a file for display. If, for instance, you want to see all lines that include the word output in your snort.conf file, you could use catand ask it to display only those lines (see Listing 25).
kali >cat/etc/snort/snort.conf|grepoutput
# 6) Configure output plugins
# Step #6: Configure output plugins
# output unified2: filename merged.log, limit 128, nostamp, mpls_event_types, vlan_event_types
output unified2: filename merged.log, limit 128, nostamp, mpls_event_types, vlan_event_types
# output alert_unified2: filename merged.log, limit 128, nostamp
# output log_unified2: filename merged.log, limit 128, nostamp
# output alert_syslog: LOG_AUTH LOG_ALERT
# output log_tcpdump: tcpdump.log
Listing 25: Displaying lines with instances of the keyword or phrase specified by grep
This command will first view snort.conf and then use a pipe (|) to send it to grep, which will take the file as input, look for lines with occurrences of the word output, and display only those lines. The grepcommand is a very powerful and essential command for working in Linux, because it can save you hours of searching for every occurrence of a word or command in a file.
Hacker Challenge: Using grep, nl, tail, and head
Let’s say you want to display the five lines immediately before a line that says #Step#6: Configureoutputpluginsusing at least four of the commands you just learned. How would you do it? (Hint: there are many more options to these commands than those we’ve discussed. You can learn more commands by using the builtin Linux command man. For example, man tailwill show the help file for the tailcommand.)
There are many ways to solve this challenge; here, I show you which lines to change to do it one way, and your job is to find another method.
Step 1
kali >nl/etc/snort.conf|grepoutput
34 # 6) Configure output plugins
512 # Step #6: Configure output plugins
518 # output unified2: filename merged.log, limit 128, nostamp, mpls_event_types, vlan_event_types
521 # output alert_unified2: filename snort.alert, limit 128, nostamp 522 # output log_unified2: filename snort.log, limit 128, nostamp
525 # output alert_syslog: LOG_AUTH LOG_ALERT
528 # output log_tcpdump: tcpdump.log
We can see that the line #Step#6:Configureoutputpluginsis line 512, and we know we want the five lines preceding line 512 as well as line 512 itself (that is, lines 507 to 512).
Step 2
kali >tail-n+507/etc/snort/snort.conf|head-n6
nested_ip inner, \
whitelist $WHITE_LIST_PATH/white_list.rules, \
blacklist $BLACK_LIST_PATH/black_list.rules
################################################### # Step #6: Configure output plugins
Here, we use tailto start at line 507 and then output into head, and we return just the top six lines, giving us the five lines preceding the Step#6line, with that line included.
USING SED TO FIND AND REPLACE
The sedcommand lets you search for occurrences of a word or a text pattern and then perform some action on it. The name of the command is a contraction of stream editor, because it follows the same concept as a stream editor. In its most basic form, sedoperates like the Find and Replace function in Windows.
Search for the word mysql in the snort.conf file using grep, like so:
kali >cat/etc/snort/snort.conf|grepmysql
include $RULE_PATH/mysql.rules
#include $RULE_PATH/servermysql.rules
You should see that the grepcommand found two occurrences of mysql.
Let’s say you want sedto replace every occurrence of mysql with MySQL (remember, Linux is case sensitive) and then save the new file to snort2.conf. You could do this by entering the command shown in Listing 26.
kali >seds/mysql/MySQL/g/etc/snort/snort.conf>snort2.conf
Listing 26: Using sedto find and replace keywords or phrases
The scommand performs the search: you first give the term you are searching for (mysql) and then the term you want to replace it with (MySQL), separated by a slash (/). The g command tells Linux that you want the replacement performed globally. Then the result is saved to a new file named snort2.conf.
Now, when you use grepwith snort2.conf to search for mysql, you’ll see that no instances were found, but when you search for MySQL, you’ll see two occurrences.
kali >catsnort2.conf|grepMySQL
include $RULE_PATH/MySQL.rules
#include $RULE_PATH/serverMySQL.rules
If you wanted to replace only the first occurrence of the term mysql, you would leave out the trailing gcommand.
kali >seds/mysql/MySQL/snort.conf>snort2.conf
You can also use the sedcommand to find and replace any specific occurrence of a word rather than all occurrences or just the first occurrence. For instance, if you want to replace only the second occurrence of the word mysql, simply place the number of the occurrence (in this case, 2) at the end of the command:
kali >seds/mysql/MySQL/2snort.conf>snort2.conf
This command affects only the second occurrence of mysql.
VIEWING FILES WITH MORE AND LESS
Although catis a good utility for displaying files and creating small files, it certainly has its limitations when displaying large files. When you use catwith snort.conf, the file scrolls through every page until it comes to the end, which is not very practical if you want to glean any information from it.
For working with larger files, we have two other viewing utilities: moreand less.
Controlling the Display with more
The morecommand displays a page of a file at a time and lets you page down through it using the ENTER key. It’s the utility that the man pages use, so let’s look at it first. Open snort.conf with the morecommand, as shown in Listing 27.
kali >more/etc/snort/snort.conf
snip
# Snort build options:
# Options: enablegre enablempls enabletargetbased
enableppm enableperfprofiling enablezlib enableactive
response enablenormalizer enablereload enablereact
enableflexresp3
#
More(2%)
Listing 27: Using moreto display terminal output one page at a time
Notice that moredisplays only the first page and then stops, and it tells us in the lowerleft corner how much of the file is shown (2 percent in this case). To see additional lines or pages, press ENTER. To exit more, enter q(for quit).
Displaying and Filtering with less
The lesscommand is very similar to more, but with additional functionality—hence, the common Linux aficionado quip, “Less is more.” With less, you can not only scroll through a file at your leisure, but you can also filter it for terms. As in Listing 28, open snort.conf with less.
kali >less/etc/snort/snort.conf
snip
# Snort build options:
# Options: enablegre enablempls enabletargetbased
enableppm enableperfprofiling enablezlib enableactive
response enablenormalizer enablereload enablereact
/etc/snort/snort.conf
Listing 28: Using lessto both display terminal output a page at a time and filter results
Notice in the bottom left of the screen that lesshas highlighted the path to the file. If you press the forward slash (/) key, lesswill let you search for terms in the file. For instance, when you first set up Snort, you need to determine how and where you want to send your intrusion alert output. To find that section of the configuration file, you could simply search for output, like so:
# Snort build options:
# Options: enablegre enablempls enabletargetbased
enableppm enableperfprofiling enablezlib enableactive
response enablenormalizer enablereload enablereact
/output
This will immediately take you to the first occurrence of output and highlight it. You can then look for the next occurrence of output by typing n(for next).
# Step #6: Configure outputplugins
# For more information, see Snort Manual, Configuring Snort Output Modules #####################################################################
#unified2
# Recommended for most installs
# outputunified2: filename merged.log, limit 128, nostamp, mpls_event_types,
vlan_event_types
outputunified2: filename snort.log, limit 128, nostamp, mpls_event_types, vlan_event_types
# Additional configuration for specific types of installs
# outputalert_unified2: filename snort.alert, limit 128, nostamp
# outputlog_unified2: filename snort.log, limit 128, nostamp
# syslog
# outputalert_syslog: LOG_AUTH LOG_ALERT
:
As you can see, lesstook you to the next occurrence of the word output and highlighted all the search terms. In this case, it went directly to the output section of Snort. How convenient!
SUMMARY
Linux has numerous ways of manipulating text, and each way comes with its own strengths and weaknesses. We’ve touched on a few of the most useful methods in this chapter, but I suggest you try each one out and develop your own feel and preferences. For example, I think grepis indispensable, and I use lesswidely, but you might feel different.
EXERCISES
Before you move on to Chapter 3, try out the skills you learned from this chapter by completing the following exercises:
1. Navigate to /usr/share/wordlists/metasploit. This is a directory of multiple wordlists that can be used to brute force passwords in various password
protected devices using Metasploit, the most popular pentesting and
hacking framework.
2. Use the catcommand to view the contents of the file passwords.lst.
3. Use the morecommand to display the file passwords.lst.
4. Use the lesscommand to view the file passwords.lst.
5. Now use the nlcommand to place line numbers on the passwords in
passwords.lst. There should be 88,396 passwords.
6. Use the tailcommand to see the last 20 passwords in passwords.lst.
7. Use the catcommand to display passwords.lst and pipe it to find all the
passwords that contain 123.
History
Topics
Tutorials
Offers & Deals Highlights
Settings
Support
3
ANALYZING AND MANAGING NETWORKS
Understanding networking is crucial for any aspiring hacker. In many situations, you’ll be hacking something over a network, and a good hacker needs to know how to connect Sign Out
to and interact with that network. For example, you may need to connect to a computer with your Internet Protocol (IP) address hidden from view, or you may need to redirect a target’s Domain Name System (DNS) queries to your system; these kinds of tasks are relatively simple but require a little Linux network knowhow. This chapter shows you
some essential Linux tools for analyzing and managing networks during your network hacking adventures.
ANALYZING NETWORKS WITH IFCONFIG
The ifconfigcommand is one of the most basic tools for examining and interacting with active network interfaces. You can use it to query your active network connections by simply entering ifconfigin the terminal. Try it yourself, and you should see output similar to Listing 31.
kali >ifconfig
➊eth0Linkencap:EthernetHWaddr 00:0c:29:ba:82:0f
➋inet addr:192.168.181.131 ➌Bcast:192.168.181.255 ➍Mask:255.255.255.0 snip
➎lo Linkencap:Local Loopback
inet addr:127.0.0.1 Mask:255.0.0.0
snip
➏wlan0 Link encap:EthernetHWaddr 00:c0:ca:3f:ee:02
Listing 31: Using ifconfigto get network information
As you can see, the command ifconfigshows some useful information about the active network interfaces on the system. At the top of the output is the name of the first detected interface, eth0➊, which is short for Ethernet0 (Linux starts counting at 0 rather than 1). This is the first wired network connection. If there were more wired Ethernet interfaces, they would show up in the output using the same format (eth1, eth2, and so on).
The type of network being used (Ethernet) is listed next, followed by HWaddrand an address; this is the globally unique address stamped on every piece of network hardware—in this case, the network interface card (NIC), usually referred to as the media access control (MAC) address.
The second line contains information on the IP address currently assigned to that network interface (in this case, 192.168.181.131 ➋); the Bcast➌, or broadcast address, which is the address used to send out information to all IPs on the subnet; and finally the network mask (Mask➍), which is used to determine what part of the IP address is connected to the local network. You’ll also find more technical info in this section of the output, but it’s beyond the scope of this Linux networking basics chapter.
The next section of the output shows another network connection called lo➎, which is short for loopback address and is sometimes called localhost. This is a special software address that connects you to your own system. Software and services not running on your system can’t use it. You would use loto test something on your system, such as your own web server. The localhost is generally represented with the IP address 127.0.0.1.
The third connection is the interface wlan0➏. This appears only if you have a wireless interface or adapter, as I do here. Note that it also displays the MAC address of that device (HWaddr).
This information from ifconfigenables you to connect to and manipulate your local area network (LAN) settings, an essential skill for hacking.
CHECKING WIRELESS NETWORK DEVICES WITH IWCONFIG
CHECKING WIRELESS NETWORK DEVICES WITH IWCONFIG
If you have a wireless adapter, you can use the iwconfigcommand to gather crucial information for wireless hacking such as the adapter’s IP address, its MAC address, what mode it’s in, and more. The information you can glean from this command is particularly important when you’re using wireless hacking tools like aircrackng.
Using the terminal, let’s take a look at some wireless devices with iwconfig(see Listing 3 2).
kali >iwconfig
wlan0 IEEE 802.11bg ESSID:off/any
Mode:Managed Access Point: Not Associated TxPower=20 dBm
snip
lo no wireless extensions
eth0 no wireless extensions
Listing 32: Using iwconfigto get information on wireless adapters
The output here tells us that the only network interface with wireless extensions is wlan0, which is what we would expect. Neither lonor eth0has any wireless extensions.
For wlan0, we learn what 802.11 IEEE wireless standards our device is capable of: band g, two early wireless communication standards. Most wireless devices now include nas well (nis the latest standard).
We also learn from iwconfigthe mode of the wireless extension (in this case, Mode:Managed, in contrast to monitor or promiscuous mode). We’ll need promiscuous mode for cracking wireless passwords.
Next, we can see that the wireless adapter is not connected (NotAssociated) to an access point (AP) and that its power is 20 dBm, which represents the strength of signal. We’ll spend more time with this information in Chapter 14.
CHANGING YOUR NETWORK INFORMATION
Being able to change your IP address and other network information is a useful skill because it will help you access other networks while appearing as a trusted device on those networks. For example, in a denialofservice (DoS) attack, you can spoof your IP so that that the attack appears to come from another source, thus helping you evade IP
capture during forensic analysis. This is a relatively simple task in Linux, and it’s done with the ifconfigcommand.
Changing Your IP Address
To change your IP address, enter ifconfigfollowed by the interface you want to reassign and the new IP address you want assigned to that interface. For example, to assign the IP address 192.168.181.115 to interface eth0, you would enter the following:
kali >ifconfigeth0192.168.181.115
kali >
When you do this correctly, Linux will simply return the command prompt and say nothing. This is a good thing!
Then, when you again check your network connections with ifconfig, you should see that your IP address has changed to the new IP address you just assigned.
Changing Your Network Mask and Broadcast Address
You can also change your network mask (netmask) and broadcast address with the ifconfigcommand. For instance, if you want to assign that same eth0interface with a netmask of 255.255.0.0 and a broadcast address of 192.168.1.255, you would enter the following:
kali >ifconfigeth0192.168.181.115netmask255.255.0.0broadcast 192.168.1.255
kali >
Once again, if you’ve done everything correctly, Linux responds with a new command prompt. Now enter ifconfigagain to verify that each of the parameters has been changed accordingly.
Spoofing Your MAC Address
You can also use ifconfigto change your MAC address (or HWaddr). The MAC address is globally unique and is often used as a security measure to keep hackers out of networks —or to trace them. Changing your MAC address to spoof a different MAC address is almost trivial and neutralizes those security measures. Thus, it’s a very useful technique for bypassing network access controls.
To spoof your MAC address, simply use the ifconfigcommand’s downoption to take down the interface (eth0in this case). Then enter the ifconfigcommand followed by the interface name (hwfor hardware, etherfor Ethernet) and the new spoofed MAC address. Finally, bring the interface back up with the upoption for the change to take place. Here’s an example:
kali >ifconfigeth0down
kali >ifconfigeth0hwether00:11:22:33:44:55
kali >ifconfigeth0up
Now, when you check your settings with ifconfig, you should see that HWaddrhas changed to your new spoofed IP address!
Assigning New IP Addresses from the DHCP Server
Linux has a Dynamic Host Configuration Protocol (DHCP) server that runs a daemon— a process that runs in the background—called dhcpd, or the dhcp daemon. The DHCP server assigns IP addresses to all the systems on the subnet and keeps log files of which IP address is allocated to which machine at any one time. This makes it a great resource for forensic analysts to trace hackers with after an attack. For that reason, it’s useful to understand how the DHCP server works.
Usually, to connect to the internet from a LAN, you must have a DHCPassigned IP. Therefore, after setting a static IP address, you must return and get a new DHCP assigned IP address. To do this, you can always reboot your system, but I’ll show you how to retrieve a new DHCP without having to shut your system down and restart it.
To request an IP address from DHCP, simply call the DHCP server with the command dhclientfollowed by the interface you want the address assigned to. Different Linux distributions use different DHCP clients, but Kali is built on Debian, which uses dhclient. Therefore, you can assign a new address like this:
kali >dhclienteth0
The dhclientcommand sends a DHCPDISCOVERrequest from the network interface specified (here, eth0). It then receives an offer (DHCPOFFER) from the DHCP server (192.168.181.131 in this case) and confirms the IP assignment to the DHCP server with a dhcp request.
kali >ifconfig
eth0Linkencap:EthernetHWaddr 00:0c:29:ba:82:0f
inet addr:192.168.181.131 Bcast:192.168.181.131 Mask:255.255.255.0
Depending on the configuration of the DHCP server, the IP address assigned in each case might be different.
Now when you enter ifconfig, you should see that the DHCP server has assigned a new IP address, a new broadcast address, and new netmask to your network interface eth0.
MANIPULATING THE DOMAIN NAME SYSTEM
Hackers can find a treasure trove of information on a target in its Domain Name System (DNS). DNS is a critical component of the internet, and although it’s designed to translate domain names to IP addresses, a hacker can use it to garner information on the target.
Examining DNS with dig
DNS is the service that translates a domain name like hackersarise.com to the appropriate IP address; that way, your system knows how to get to it. Without DNS, we would all have to remember thousands of IP addresses for our favorite websites—no small task even for a savant.
One of the most useful commands for the aspiring hacker is dig, which offers a way to gather DNS information about a target domain. The stored DNS information can be a key piece of early reconnaissance to obtain before attacking. This information could include the IP address of the target’s nameserver (the server that translates the target’s name to an IP address), the target’s email server, and potentially any subdomains and IP addresses.
For instance, enter dighackers-arise.comand add the nsoption (short for nameserver). The nameserver for hackersarise.com is displayed in the ANSWERSECTIONof Listing 33.
kali >dighackers-arise.comns
snip
;; QUESTION SECTION:
;hackersarise.com. IN NS
;; ANSWER SECTION:
hackersarise.com. 5 IN NS ns7.wixdns.net.
hackersarise.com. 5 IN NS ns6.wixdns.net.
;; ADDITIONAL SECTION:
ns6.wixdns.net. 5 IN A 216.239.32.100
snip
Listing 33: Using digand its nsoption to get information on a domain nameserver
Also note in the ADDITIONALSECTIONthat this digquery reveals the IP address (216.239.32.100) of the DNS server serving hackersarise.com.
You can also use the digcommand to get information on email servers connected to a domain by adding the mxoption (mxis short for mail exchange server). This information is critical for attacks on email systems. For example, info on the www.hackers arise.com email servers is shown in the AUTHORITYSECTIONof Listing 34.
kali >dighackers-arise.commx
snip
;; QUESTION SECTION:
;hackersarise.com. IN MX
;; AUTHORITY SECTION:
hackersarise.com. 5 IN SOA ns6.wixdns.net. support.wix.com 2016052216 10800 3600 604 800 3600
snip
Listing 34: Using digand its mxoption to get information on a domain mail exchange server
The most common Linux DNS server is the Berkeley Internet Name Domain (BIND). In some cases, Linux users will refer to DNS as BIND, but don’t be confused: DNS and BIND both map individual domain names to IP addresses.
Changing Your DNS Server
In some cases, you may want to use another DNS server. To do so, you’ll edit a plaintext file named /etc/resolv.conf on the system. Open that file in a text editor—I’m using Leafpad. Then, on your command line, enter the precise name of your editor followed by the location of the file and the filename. For example,
kali >leafpad/etc/resolv.conf
will open the resolv.conf file in the /etc directory in my specified graphical text editor, Leafpad. The file should look something like Figure 31.
Figure 31: A typical resolv.conf file in a text editor
As you can see on line 3, my nameserver is set to a local DNS server at 192.168.181.2. That works fine, but if I want to add or replace that DNS server with, say, Google’s public DNS server at 8.8.8.8, I’d add the following line in the /etc/resolv.conf file to specify the nameserver:
nameserver 8.8.8.8
Then I would just need to save the file. However, you can also achieve the same result exclusively from the command line by entering the following:
kali >echo"nameserver8.8.8.8">/etc/resolv.conf
This command echoes the string nameserver8.8.8.8and redirects it (>) to the file /etc/resolv.conf, replacing the current content. Your /etc/resolv.conf file should now look like Figure 32.
Figure 32: Changing the resolv.conf file to specify Google’s DNS server
If you open the /etc/resolv.conf file now, you should see that it points the DNS requests to Google’s DNS server rather than your local DNS server. Your system will now go out to the Google public DNS server to resolve domain names to IP addresses. This can mean domain names take a little longer to resolve (probably milliseconds). Therefore, to maintain speed but keep the option of using a public server, you might want to retain
the local DNS server in the resolv.conf file and follow it with a public DNS server. The operating system queries each DNS server listed in the order it appears in /etc/resolv.conf, so the system will only refer to the public DNS server if the domain name can’t be found in the local DNS server.
NOTE
If you’re using a DHCP address and the DHCP server provides a DNS
setting, the DHCP server will replace the contents of the file when it renews the DHCP address.
Mapping Your Own IP Addresses
A special file on your system called the hosts file also performs domain name–IP address translation. The hosts file is located at /etc/hosts, and kind of as with DNS, you can use it to specify your own IP address–domain name mapping. In other words, you can determine which IP address your browser goes to when you enter www.microsoft.com (or any other domain) into the browser, rather than let the DNS server decide. As a hacker, this can be useful for hijacking a TCP connection on your local area network to direct traffic to a malicious web server with a tool such as dnsspoof.
From the command line, type in the following command (you can substitute your preferred text editor for leafpad):
kali >leafpad/etc/hosts
You should now see your hosts file, which will look something like Figure 33. Figure 33: A default Kali Linux hosts file
By default, the hosts file contains only a mapping for your localhost, at 127.0.0.1, and
your system’s hostname (in this case, Kali, at 127.0.1.1). But you can add any IP address mapped to any domain you’d like. As an example of how this might be used, you could map www.bankofamerica.com to your local website, at 192.168.181.131.
127.0.0.1 localhost
127.0.1.1 kali
192.168.181.131 bankofamerica.com
# The following lines are desirable for IPv6 capable hosts
::1 localhost ip6localhost ip6loopback
ff02::1 ip6allnodes
ff02::2 ip6allrouters
Make certain you press TAB between the IP address and the domain key—not the spacebar.
As you get more involved in your hacking endeavors and learn about tools like dnsspoof and Ettercap, you’ll be able to use the hosts file to direct any traffic on your LAN that visits www.bankofamerica.com to your web server at 192.168.181.131.
Pretty easy, right?
SUMMARY
Any hacker needs some basic Linux networking skills to connect, analyze, and manage networks. As you progress, these skills will become more and more useful for doing reconnaissance, spoofing, and connecting to target systems.
EXERCISES
Before you move on to Chapter 4, try out the skills you learned from this
chapter by completing the following exercises:
1. Find information on your active network interfaces.
2. Change the IP address on eth0to 192.168.1.1.
3. Change your hardware address on eth0.
4. Check whether you have any available wireless interfaces active.
5. Reset your IP address to a DHCP-assigned address.
6. Find the nameserver and email server of your favorite website. 7. Add Google’s DNS server to your /etc/resolv.conf file so your system refers to that server when it can’t resolve a domain name query with your local DNS server.
History
Topics
Tutorials
Offers & Deals Highlights
Settings
4
ADDING AND REMOVING SOFTWARE
One of the most fundamental tasks in Linux—or any operating system—is adding and Support
removing software. You’ll often need to install software that didn’t come with your Sign Out
distribution or remove unwanted software so it doesn’t take up hard drive space.
Some software requires other software to run, and you’ll sometimes find that you can download everything you need at once in a software package, which is a group of files —typically libraries and other dependencies—that you need for a piece of software to run successfully. When you install a package, all the files within it are installed together, along with a script to make loading the software simpler.
In this chapter, we examine three key methods for adding new software: apt package manager, GUIbased installation managers, and git.
USING APT TO HANDLE SOFTWARE
In Debianbased Linux distributions, which include Kali and Ubuntu, the default software manager is the Advanced Packaging Tool, or apt, whose primary command is apt-get. In its simplest and most common form, you can use apt-getto download and install new software packages, but you can also update and upgrade software with it.
Searching for a Package
Before downloading a software package, you can check whether the package you need is available from your repository, which is a place where your operating system stores information. The apt tool has a search function that can check whether the package is available. The syntax is straightforward:
aptcache search keyword
Note that we use the apt-cachecommand to search the apt cache, or the place it stores the package names. So if you were searching for the intrusion detection system Snort, for example, you would enter the command shown in Listing 41.
kali >apt-cachesearchsnort
fwsnort Snorttoiptables rule translator
ippl IP protocols logger
--snip--
snort flexible Network Intrusion Detection System
snortcommon flexible Network Intrusion Detection System common files --snip--
Listing 41: Searching the system with apt-cachefor Snort
As you can see, numerous files have the keyword snort in them, but near the middle of the output we see snort–flexibleNetworkIntrusionDetectionSystem. That’s what we are looking for!
Adding Software
Now that you know the snort package exists in your repository, you can use apt-getto download the software.
To install a piece of software from your operating system’s default repository in the terminal, use the apt-getcommand, followed by the keyword installand then the name of the package you want to install. The syntax looks like this:
aptget install packagename
Let’s try this out by installing Snort on your system. Enter apt-getinstallsnortas a command statement, as shown in Listing 42.
kali >apt-getinstallsnort
Reading package lists... Done
Building dependency tree
Reading state information... Done
Suggested packages:
snortdoc
The following NEW packages will be installed:
snort
snip
Install these packages without verification [Y/n]?
Listing 42: Installing Snort with apt-getinstall
The output you see tells you what is being installed. If everything looks correct, go ahead and enter ywhen prompted, and your software installation will proceed.
Removing Software
When removing software, use apt-getwith the removeoption, followed by the name of the software to remove (see Listing 43).
kali >apt-getremovesnort
Reading package lists... Done
Building dependency tree
Reading state information... Done
The following packages were automatically installed and are no longer required:
libdaq0 libprelude2 oinkmaster snortcommonlibraries snortrulesdefault snip
Do you want to continue [Y/n]?
Listing 43: Removing Snort with apt-getremove
Again, you’ll see the tasks being done in real time and you will be asked whether you want to continue. You can enter yto uninstall, but you might want to keep Snort since we’ll be using it again. The removecommand doesn’t remove the configuration files, which means you can reinstall the same package in the future without reconfiguring.
If you do want to remove the configuration files at the same time as the package, you
can use the purgeoption, as shown in Listing 44.
kali >apt-getpurge snort
Reading package lists... Done
Building dependency tree
Reading state information... Done
The following packages were automatically installed and are no longer required: libdaq0 libprelude2 oinkmaster snortcommonlibraries snortrulesdefault snip
Do you want to continue [Y/n]?
Listing 44: Removing Snort and the accompanying configuration files with apt-get purge
Simply enter Yat the prompt to continue the purge of the software package and the configuration files.
You may have noticed the line Thefollowingpackageswereautomaticallyinstalledandareno longerrequiredin the output. To keep things small and modular, many Linux packages are broken into software units that many different programs might use. When you installed Snort, you installed several dependencies or libraries with it that Snort requires in order to run. Now that you’re removing Snort, those other libraries or dependencies are no longer required, so they are removed, too.
Updating Packages
Software repositories will be periodically updated with new software or new versions of existing software. These updates don’t reach you automatically, so you have to request them in order to apply these updates to your own system. Updating isn’t the same as upgrading: updating simply updates the list of packages available for download from the repository, whereas upgrading will upgrade the package to the latest version in the repository.
You can update your individual system by entering the apt-getcommand followed by the keyword update. This will search through all the packages on your system and check whether updates are available. If so, the updates are downloaded (see Listing 45).
kali >apt-getupdate
Get:1 http://mirrors.ocf.berkeley.edu/kali kalirolling InRelease [30.5kb] Get:2 http://mirrors.ocf.berkeley.edu/kali kalirolling/main amd64 Packages
[14.9MB]
Get:3 http://mirrors.ocf.berkeley.edu/kali kalirolling nonfree amd64 Packages [163kb]
Get:4 http://mirrors.ocf.berkeley.edu/kali kalirolling/contrib amd64 Packages [107 kB]
Fetched 15.2 MB in 1min 4s (236 kB/s)
Reading package lists... Done
Listing 45: Updating all outofdate packages with apt-getupdate
The list of available software in the repository on your system will be updated. If the update is successful, your terminal will state Readingpackagelists...Done, as you can see in Listing 45. Note that the name of the repository and the values—time, size, and so on—might be different on your system.
Upgrading Packages
To upgrade the existing packages on your system, use apt-getupgrade. Because upgrading your packages may make changes to your software, you must be logged in as root or use the sudocommand before entering apt-getupgrade. This command will upgrade every package on your system that apt knows about, meaning only those stored in the repository (see Listing 46). Upgrading can be timeconsuming, so you might not be able to use your system for a while.
kali >apt-getupgrade
Reading package lists... Done
Building dependency tree... Done
Calculating upgrade... Done
The following packages were automatically installed and no longer required: snip
The following packages will be upgraded:
snip
1101 upgraded, 0 newly installed, 0 to remove and 318 not upgraded. Need to get 827 MB of archives.
After this operation, 408 MB disk space will be freed.
Do you want to continue? [Y/n]
Listing 46: Upgrading all outofdate packages with apt-getupgrade
You should see in the output that your system estimates the amount of hard drive space necessary for the software package. Go ahead and enter Yif you want to continue and have enough hard drive space for the upgrade.
ADDING REPOSITORIES TO YOUR SOURCES.LIST FILE
The servers that hold the software for particular distributions of Linux are known as repositories. Nearly every distribution has its own repositories of software—developed and configured for that distribution—that might not work well, or at all, with other distributions. Although these repositories often contain the same or similar software, they aren’t identical, and they sometimes have different versions of the same software or entirely different software.
You will, of course, be using the Kali repository, which has a large amount of security and hacking software. But because Kali specializes in security and hacking, it doesn’t include some specialty software and tools and even some runofthemill software. It’s worth adding a backup repository or two that your system can search through in case it doesn’t find it a specific software in the Kali repository.
The repositories your system will search for software are stored in the sources.list file, and you can alter this file to define from which repositories you want to download software. I often add the Ubuntu repositories after the Kali repositories in my sources.list file; that way, when I request to download a new software package, my system will first look in the Kali repository, and if the software package isn’t there, it will look in the Ubuntu repository.
You can find the sources.list file at /etc/apt/sources.list and open it with any text editor. I’ll again be using Leafpad. To open the sources.list file, enter the following into your terminal, replacing leafpadwith the name of your editor:
kali >leafpad/etc/apt/sources.list
After entering this command, you should see a window like the one in Figure 41, with a list of Kali’s default repositories.
Figure 41: Kali’s default repositories in sources.list
Many Linux distributions divide repositories into separate categories. For instance, Ubuntu breaks out its repository categories as follows:
main Contains supported open source software
universe Contains communitymaintained open source software multiverse Contains software restricted by copyright or other legal issues restricted Contains proprietary device drivers
backports Contains packages from later releases
I don’t recommend using testing, experimental, or unstable repositories in your sources.list because they can download problematic software to your system. Software that isn’t fully tested might break your system.
When you ask to download a new software package, the system looks sequentially through your repositories listed in sources.list and stops when it finds the desired package. Check first that the repository is compatible for your system. Kali, like Ubuntu, is built on Debian, so these repositories work pretty well with each of these systems.
To add a repository, just edit the sources.list file by adding the name of the repository to the list and then save the file. Say, for example, you want to install Oracle Java 8 on Kali. No apt package for Oracle Java 8 is available as part of the default Kali sources, but a quick search online shows that the fine folk at WebUpd8 have created one. If you add their repository to the sources, you can then install Oracle Java 8 with the apt-get installoracle-java8-installercommand. At the time of writing, you would need to add the following repository locations to sources.list in order to add the necessary repositories:
deb http://ppa.launchpad.net/webupd8team/java/ubuntu trusty main debsrc http://ppa.launchpad.net/webupd8team/java/ubuntu precise main
USING A GUI-BASED INSTALLER
Newer versions of Kali no longer include a GUIbased software installation tool, but you can always install one with the apt-getcommand. The two most common GUIbased installation tools are Synaptic and Gdebi. Let’s install Synaptic and use it to install our Snort package:
kali >apt-getinstallsynaptic
Reading package lists... Done
Building dependency tree
Reading state information... Done
snip
Processing triggers for menu (2.1.47)...
kali >
Once you have Synaptic installed, you can start it from Settings ▸ Synaptic Package Manager, which should open a window like the one in Figure 42.
Figure 42: The Synaptic Package Manager interface
Now you can search for the package you’re looking for. Simply click the Search tab to open a search window. Because you are looking for Snort again, enter snortinto the search window and click Search. Scroll down the search results to find the package you’re looking for. Check the box next to snort and then click the Apply tab, as shown in Figure 43. Synaptic will now download and install Snort from the repository along with any necessary dependencies.
Figure 43: Downloading Snort from the Synaptic Package Manager
INSTALLING SOFTWARE WITH GIT
Sometimes the software you want isn’t available in any of the repositories—especially if it’s brand new—but it may be available on github (https://www.github.com/), a site that allows developers to share their software with others to download, use, and provide feedback. For instance, if you want bluediving, a Bluetooth hacking and pentesting suite, and can’t find it in the Kali repository, you can search github for the software by entering bluediving into the search bar. If it exists on github, you should see the repository for it in the search results.
Once you’ve found the software on github, you can install it from the terminal by entering the gitclonecommand followed by its github URL. For instance, bluediving is
located at https://www.github.com/balle/bluediving.git. To clone it into your system, enter the command shown in Listing 47.
kali >gitclonehttps://www.github.com/balle/bluediving.git Cloning into 'bluediving'...
remote: Counting objects: 131, Done.
remote: Total 131 (delta 0), reused 0 (delta 0), packreused 131
Receiving objects: 100% (131/131), 900.81 KiB | 646.00 KiB/s, Done. Resolving deltas: 100% (9/9), Done.
Checking connectivity... Done.
Listing 47: Cloning bluediving with gitclone
The gitclonecommand copies all the data and files from that location onto your system. You can check to see that they’ve been successfully downloaded by using the long listing command ls–lon the target directory, like so:
kali >ls-l
If you’ve successfully cloned bluediving to your system, you should see the following output:
total 80
drwxrxrx 7 root root 4096 Jan 10 22:19 bluediving
drwxrxrx 2 root root 4096 Dec 5 11:17 Desktop
drwxrxrx 2 root root 4096 Dec 5 11:17 Documents
drwxrxrx 2 root root 4096 Dec 5 11:17 Downloads
drwxrxrx 2 root root 4096 Dec 5 11:17 Music
snip
As you can see, bluediving has been successfully cloned to the system, and a new directory named bluediving has been created for its files.
SUMMARY
In this chapter, you learned a few of the many ways to download and install new software on your Linux system. Software package managers (like apt), GUIbased installers, and git clones are the most common and crucial methods for an aspiring hacker to know. You’ll soon find yourself becoming familiar with each of them.
EXERCISES
Before you move on to Chapter 5, try out the skills you learned from this chapter by completing the following exercises:
1. Install a new software package from the Kali repository. 2. Remove that same software package.
3. Update your repository.
4. Upgrade your software packages.
5. Select a new piece of software from github and clone it to your system.
History Topics
5
CONTROLLING FILE AND DIRECTORY PERMISSIONS
Tutorials
Offers & Deals
Highlights
Settings
Support
Not every user of a single operating system should have the same level of access to files and directories. Like any professional or enterpriselevel operating system, Linux has Sign Out
methods for securing file and directory access. This security system allows the system administrator—the root user—or the file owner to protect their files from unwanted access or tampering by granting select users permissions to read, write, or execute files. For each file and directory, we can specify the permission status for the file’s owner, for particular groups of users, and for all other users. This is a necessity in a multiuser, enterpriselevel operating system. The alternative would be quite chaotic.
In this chapter, I’ll show you how to check for and change permissions on files and directories for select users, how to set default file and directory permissions, and how to set special permissions. Finally, you will see how a hacker’s understanding of permissions might help them exploit a system.
DIFFERENT TYPES OF USERS
As you know, in Linux, the root user is allpowerful. The root user can do basically anything on the system. Other users on the system have more limited capabilities and permissions and almost never have the access that the root user has.
These other users are usually collected into groups that generally share a similar
function. In a commercial entity, these groups might be finance, engineering, sales, and so on. In an IT environment, these groups might include developers, network administrators, and database administrators. The idea is to put people with similar needs into a group that is granted relevant permissions; then each member of the group inherits the group permissions. This is primarily for the ease of administering permissions and, thus, security.
The root user is part of the root group by default. Each new user on the system must be added to a group in order to inherit the permissions of that group.
GRANTING PERMISSIONS
Each and every file and directory must be allocated a particular level of permission for the different identities using it. The three levels of permission are as follows:
rPermission to read. This grants permission only to open and view a file. wPermission to write. This allows users to view and edit a file.
xPermission to execute. This allows users to execute a file (but not necessarily view or edit it).
In this way, the root user can grant users a level of permission depending on what they need the files for. When a file is created, typically the user who created it is the owner of the file, and the owning group is the user’s current group. The owner of the file can grant various access privileges to it. Let’s look at how to change permissions to pass ownership to individual users and to groups.
Granting Ownership to an Individual User
To move ownership of a file to a different user so that they have the ability to control permissions, we can use the chown(or change owner) command:
kali >chown➊bob➋/tmp/bobsfile
Here, we give the command, the name of the user we are giving ownership to, and then the location and name of the relevant file. This command grants the user account for Bob ➊ ownership of bobsfile ➋.
Granting Ownership to a Group
To transfer ownership of a file from one group to another, we can use the chgrp(or change group) command.
Hackers are often more likely to work alone than in groups, but it’s not unheard of for several hackers or pentesters work together on a project, and in that case, using groups is necessary. For instance, you might have a group of pentesters and a group of security team members working on the same project. The pentesters in this example are the root group, meaning they have all permissions and access. The root group needs access to the hacking tools, whereas the security folk only need access to defensive tools such as an intrusion detection system (IDS). Let’s say the root group downloads and installs a program named newIDS; the root group will need to change the ownership to the security group so the security group can use it at will. To do so, the root group would simply enter the following command:
kali >chgrp➊security➋newIDS
This command passes the securitygroup ➊ ownership of newIDS ➋.
Now you need to know how to check whether these allocations have worked. You’ll do that by checking a file’s permissions.
CHECKING PERMISSIONS
When you want to find out what permissions are granted to what users for a file or directory, use the lscommand with the –l(long) switch to display the contents of a directory in long format—this list will contain the permissions. In Listing 51, I use the ls–lcommand on the file /usr/share/hashcat (one of my favorite passwordcracking tools) in order to see what we can learn about the files there.
kali >ls–l/usr/share/hashcat
total 32952
➊ ➋ ➌ ➍ ➎ ➏ ➐
drwxrxrx 5 root root 4096 Dec 5 10:47 charsets
rwrr 1 root root 33685504 June 28 2018 hashcat.hcstat
rwrr 1 root root 33685504 June 28 2018 hashcat.hctune
drwxr xrx 2 root root 4096 Dec 5 10:47 masks
drwxr xrx 2 root root 4096 Dec 5 10:47 OpenCL
drwxr xrx 3 root root 4096 Dec 5 10:47 rules
Listing 51: Checking a file’s permissions with the long listing command On each line, we get information about:
➊ The file type
➋ The permissions on the file for owner, groups, and users, respectively ➌ The number of links (This topic is beyond the scope of the book.) ➍ The owner of the file
➎ The size of the file in bytes
➏ When the file was created or last modified
➐ The name of the file
For now, let’s focus on the seemingly incomprehensible strings of letters and dashes on the left edge of each line. They tell us whether an item is a file or directory and what permissions, if any, are on it.
The first character tells you the file type, where dstands for a directory and a dash (–) indicates a file. These are the two most common file types.
The next section defines the permissions on the file. There are three sets of three characters, made of some combination of read (r), write (w), and execute (x), in that order. The first set represents the permissions of the owner; the second, those of the group; and the last, those of all other users.
Regardless of which set of three letters you’re looking at, if you see an rfirst, that user or group of users has permission to open and read that file or directory. A was the middle letter means they can write to (modify) the file or directory, and an xat the end means they can execute (or run) the file or directory. If any r, w, or xis replaced with a dash (-), then the respective permission hasn’t been given. Note that users can have permission to execute only either binaries or scripts.
Let’s use the third line of output in Listing 51 as an example:
rwrr 1 root root 33685504 June 28 2018 hashcat.hcstat
The file is called, as we know from the right end of the line, hashcat.hcstat. After the
initial –(which indicates it’s a file), the permissions rw-tell us that the owner has read and write permissions but not execute permission.
The next set of permissions (r--) represents those of the group and shows that the group has read permission but not write or execute permissions. And, finally, we see that the rest of the users also have only read permission (r--).
These permissions aren’t set in stone. As a root user or file owner, you can change them. Next, we’ll do just that.
CHANGING PERMISSIONS
We can use the Linux command chmod(or change mode) to change the permissions. Only a root user or the file’s owner can change permissions.
In this section, we use chmodto change permissions on hashcat.hcstat using two different methods. First we use a numerical representation of permissions, and then we use a symbolic representation.
Changing Permissions with Decimal Notation
We can use a shortcut to refer to permissions by using a single number to represent one rwxset of permissions. Like everything underlying the operating system, permissions are represented in binary, so ON and OFF switches are represented by 1 and 0, respectively. You can think of the rwxpermissions as three ON/OFF switches, so when all permissions are granted, this equates to 111 in binary.
A binary set like this is then easily represented as one digit by converting it into octal, an eightdigit number system that starts with 0 and ends with 7. An octal digit represents a set of three binary digits, meaning we can represent an entire rwxset with one digit. Table 51 contains all possible permission combinations and their octal and binary representatives.
Table 51: Octal and Binary Representations of Permissions
BinaryOctalrwx
000 0 ---
001 1 --x
010 2 -w
011 3 -wx
100 4 r--
101 5 r-x
110 6 rw
111 7 rwx
Using this information, let’s go through some examples. First, if we want to set only the read permission, we could consult Table 51 and locate the value for read:
r w x
4
Next, if we want to set the permission to wx, we could use the same methodology and look for what sets the wand what sets the x:
r w x
2 1
Notice in Table 51 that the octal representation for -wxis 3, which not so coincidently happens to be the same value we get when we add the two values for setting wand x individually: 2 + 1 = 3.